 |
Michael
Hooker Microscopy
Facility
(MHMF.ORG) |
 |
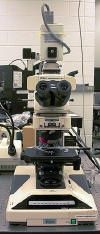 Nikon
Microphot SA (Upright Compound Microscope)
Location: 6129 Thurston Bowles
Notices
- Although the upright compound microscope can do fluorescence imaging, it is not as
efficient as the inverted Leica and
Nikon TE2000
and Nikon 80i microscopes
- DIC (Normaski) is not functioning on this scope due to a missing
polarizer and objective prism.
- When imaging with the 4x or lower power objectives the wide field of
view condenser needs to be used
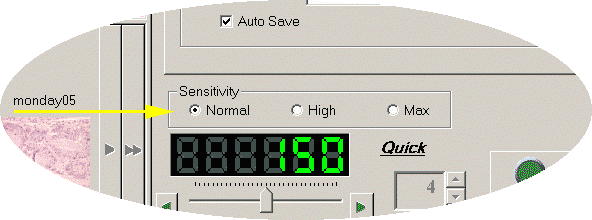
- When capturing brightfield images with the Act-1 software sometimes
flecks may be evident. To reduce this, set
camera sensitivity to normal.
Introduction
 This upright microscope is well suited for transmitted light
microscopy although it uses the older 160 mm
tube length optics. It has a good quality color digital video camera attached to it,
the Nikon DXM 1200, which is linked directly to the Dell PC (called \\Hooke on the
MHmicroscopy Windows network). Files can be
transferred to
connections to other computers on the campus network or to the
MHmicroscopy
file server called \\Minsky, which is
accessible from either
Windows or Macintosh computers.
For very low
magnification pictures please use the Leica MX16FA Fluorescence Stereo Microscope/Macroscope, which has transmitted
and/or overhead illumination available as well as fluorescence.
Two different programs can run the DXM 1200 camera (both
programs can not be run together):
- Act-1, which is
simpler to run
- C-Imaging, which is the standard acquisition and processing
software on most workstations.
Setting up the Microscope - Kohler Illumination
-
 Turn on power to microscope. Switch is on left
front side of
the base (1).
- Lower stage to allow sufficient clearance to change objective
- Choose objective
- Place slide on stage
- Open field diaphragm at base of microscope to maximum
- Minimize condenser aperture
-
 Set lamp power to about "9"
or press green "photo" button on the front of the base
- Move condenser up as close as possible to the slide using its focus knob
- Set condenser ring to "0"
- Open port to the eye pieces (use the diagrams next to the sliders for
guidance)
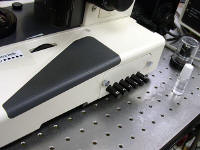
- Choose neutral density filter (NDF) combinations, 1/2, 1/8 or 1/32 (front
3 buttons on right base of scope)
for sufficient light - typically all out for no NDF
- Focus on sample first
- Minimize field diaphragm
- Focus condenser by getting the sharpest image of the field
diaphragm as possible
- Center bright spot to match center of the field of view
- Open field diaphragm to just fill the field of view
*When imaging with the 4x or lower power objectives, the wide field of
view condenser needs to be used. See a
facility director for instruction
on changing the condenser.
- Open the condenser aperture to maximum - gives more light, less
contrast, thinner depth of focus and
 more
even illumination intensity. This is the best setting for photography.
- Adjust focus if necessary
Imaging
- Turn on computer if necessary
- Log on using your 1. account name, 2. password & 3. mhmicroscopy
domain (NOT local computer, Hooke)
- The Nikon DXM 1200 camera can be
controlled with either the Act-1 or SimplePCI software
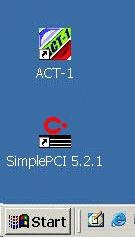
Using the ACT-1 Software (easier to use)
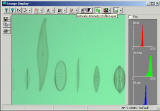
- Start Act-1 software
- In the Photo tab choose normal sensitivity
- Set Mode to "Quick" or "Fine" and picture size
1280 by 1024 pixels
- Set format to TIFF & check Auto Save
box
- Turn on line histogram display
- Choose Save tab
- Use Image Folder to select location where images will be saved:
- Choose a file name Prefix
- Choose a file name Body e.g. $## will produce a series of 2
digit numbers. "Ex:" will show name of next image file which
will be saved
- Press "Apply"
- Adjust exposure
- If the exposure is not between 1/300th ("300") and 1/12th ("12")
of a second, use combinations of the
3 neutral density filters
on the right of the microscope base to adjust the light
intensity (do NOT adjust the brightness of the lamp--this would
effect the color of your image)
- Choose Live tab
- Perform a color balance on a white rectangular area (you may need to
move your sample out of the field of view for this step)
- Do not change lamp power after performing a white balance
- Adjust exposure if necessary
- Press the green Exposure button to take a picture
- White balance does not need to be reset for subsequent slides
- repeat steps 12 & 13 for more photographs
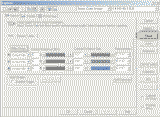
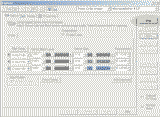
Using the SimplePCI (more complex, but on all image acquisition systems)
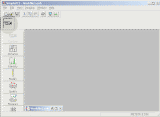
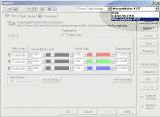
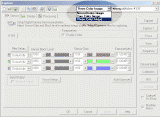
Acquiring Images Using SimplePCI with the the Nikon DMX1200 color camera
Lenses
 PlanApo 2x/0.1, 160/-
- Plan 4x/0.13, 160/-
- Plan 10x/0.3, Ph1 DL, 160/0.17
- Plan 20x/0.5 DIC, 160/0.17
- Plan 40x/0.7 DIC, 160/0.17
- 50x 0.85 to 0.5collar oil 160/0.17 - remember to set collar to NA
0.85
- Plan 100x/1.25, oil DIC, 160/0.17
- Note: use only Nikon immersion oil for the 50x or 100x objectives and
the condenser on this microscope
Condenser
- Dark field is available
- The condenser can optionally use Nikon immersion oil and is appropriate with
the 100x lens for the ultimate in resolution
- When using the 4x or 2x objectives the condenser should be
replaced with the low power condenser or removed entirely. Failure to do
this will result in an incompletely filled field of view down the scope.
Please put the condenser back for the next user.
Acquisition Software
The Nikon DXM 1200 color camera can be controlled by either
Act-1 or C-Imaging SimplePCI. Of course both programs can not be used at
the same time.
Fluorescence Filters
|
 |
 |
Copyright 2001-2014 Dr. M. Chua,
Program in Molecular Biology & Biotechnology, School of Medicine, University of North Carolina, Chapel Hill, NC 27599
|
| Go Back |
Booking Resources |
Questions/comments/problems:
Michael Chua
|
|
|
 |
Last Updated:
2014-07-23 |
 Nikon
Microphot SA (Upright Compound Microscope)
 This upright microscope is well suited for transmitted light
microscopy although it uses the older 160 mm
tube length optics. It has a good quality color digital video camera attached to it,
the Nikon DXM 1200, which is linked directly to the Dell PC (called \\Hooke on the
MHmicroscopy Windows network). Files can be
transferred to
connections to other computers on the campus network or to the
MHmicroscopy
file server called \\Minsky, which is
accessible from either
Windows or Macintosh computers.
  Turn on power to microscope. Switch is on left
front side of
the base (1).
 Set lamp power to about "9"
or press green "photo" button on the front of the base
 more
even illumination intensity. This is the best setting for photography.

 PlanApo 2x/0.1, 160/-